Getting Little Printer online

My friend @benpawle has been gently persuading me to buy one of these for a good few years now(!), and I finally relented last week and picked one up for £20 on eBay.
It’s a really nice product, but BERG – the company behind it – is sadly no more. This means the web service that supports it is also down.
Matt Webb @genmon, (BERG’s ex-CEO) has done some great work rebuilding some of the infra in open source, but the devices are still hard-coded to point bergcloud.com servers. For a while, Matt was manually pushing updates to the bridges, but now the update server’s down as well!
But all is not lost. Thanks to three serial pins on the bridge, we can get access again. My printer is now happily hooked up to Matt Webb’s //alpha.littleprinter.com backend.
Here’s how I did it
It’s going to be really helpful if you have a bit of electronics, Linux command line and SSH and SFTP experience to pull this off.
You’ll also need a few things.
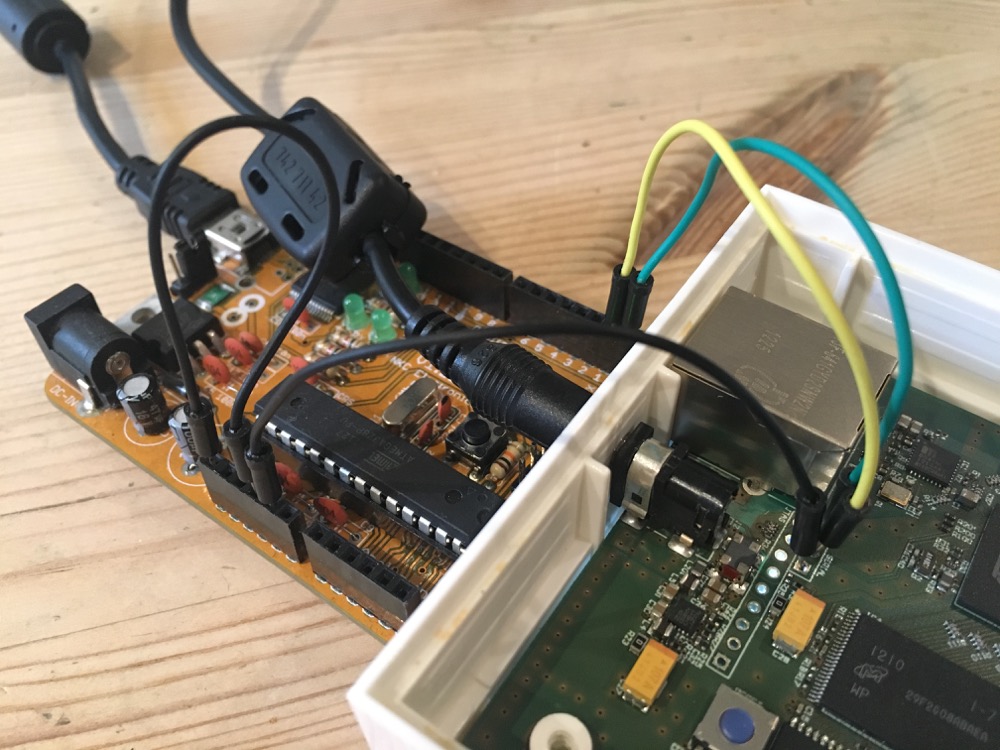
- A USB-serial adaptor. I used an Arduino with the RESET pin shorted to GND. This disables the arduino, but the FTDI USB-serial chip on there works fine. A great tip from @pipt!
- A few wires for connecting to the bridge
- A serial program (I used picocom on OS X
brew install picocom) - An SFTP client (I used Transmit for OS X)
You might brick your bridge by doing this. Proceed at your own risk!
Rooting

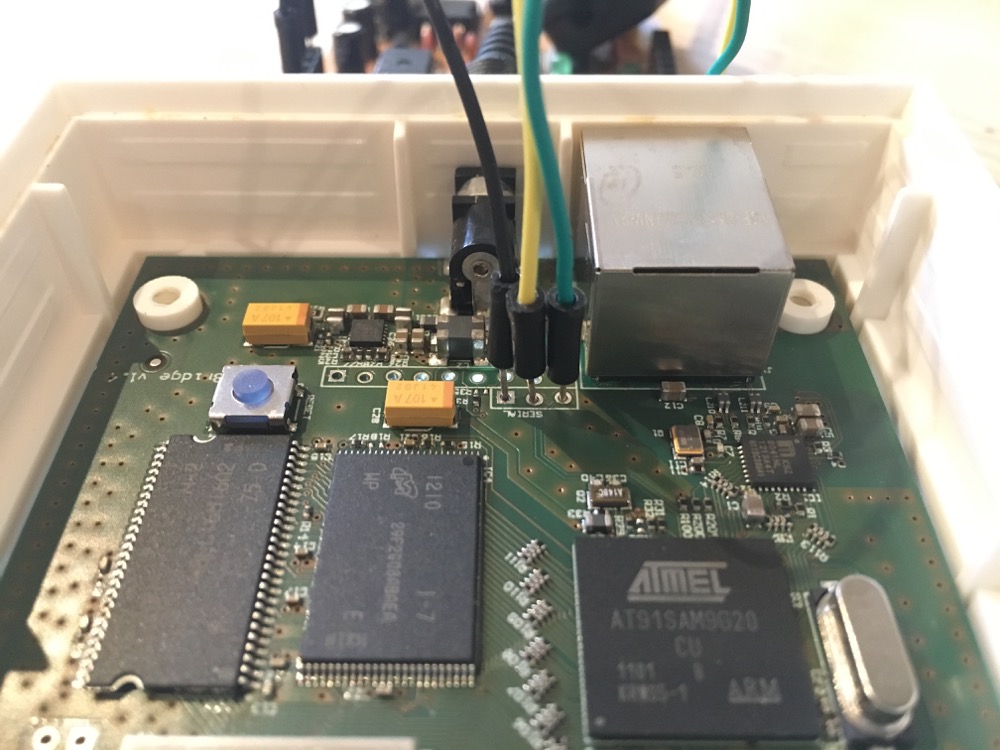
First, open up the bridge. Take care with those screws, they will strip easily.

Next, connect wires from the USB-serial to some pins on the bridge. Check pipt’s guide for the pinout.
|  |
|  |
|
Using jump wires in PCB through-holes like this isn’t great. I make sure that the wires have a bit of strain in then so they contact the through-holes okay. You could also solder them in there if your connection is intermittent.
 this guy is super smart!
Next up, follow pipt’s guide to rooting the bridge.
Couple tips:
- my serial command was
picocom --baud 115200 /dev/cu.usbserial-*- adding the
init.dfile forsshdis easier over SFTP. After allowing root login you can start the daemon manually using/usr/sbin/sshd
Once you’re there, you’ve got ssh access to the bridge. Reassemble and connect your bridge to your router via Ethernet. Find the IP address using a Bonjour browser.
Updating bergcloud firmware
The next step is to install the upgraded bridge firmware. Download the berg-bridge-dump from github (zip). Thanks @kpeeem!
Remember, after each reboot, you need to ssh and do mount -o remount,rw /.
Using your SFTP program, copy over /usr/bin/oneshot_bergcloud_bridge.sh, replacing the existing one. You should also make one alteration - remove the line /sbin/reboot -f from the bottom of this script. I don’t want the bridge stuck in a reboot-loop should something go wrong.
Now, backup your /usr/local/bergcloud-bridge folder (you can just rename it to bergcloud-bridge-backup) and copy over the one from berg-bridge-dump.
Now reboot your bridge (send reboot over ssh). Give it a few minutes and then try to connect to the web address http://<bridge-ip>:81/. If you see a password-prompt, rejoice! Username “berg”, password “hereandthere”. You should see a little web interface.
Debugging
If it’s not working, there might be some logs at
/tmp/bergcloud_bridge.log. These were disabled in the new version, though.The Python code for bergcloud can be checked out here.
Pairing the Little Printer
Finally, we can hook Little Printer up to @genmon’s servers. Follow the instructions from step 4 of this guide.
😅 Done!
It lives!
